SVG and file preparation
When a project contains many similar pieces, confusion often begins after cutting rather than during it. Several nearly identical side panels, spacers or small joiners can quickly become hard to tell apart on a worktable. A mistake in sorting may cost more time than preparing the file in the first place. Simple part labels help connect a cut piece with an assembly guide without changing the shape of the original design.
The safest principle is to keep labels separate from the paths that will be cut. That keeps the marks useful during preparation while reducing the risk that they become unintended cutting paths. Depending on the workflow, you may assign the labels to a safe engraving operation or remove them before the final run. Either choice needs to be confirmed in the software that controls your laser, CNC machine or cutter.
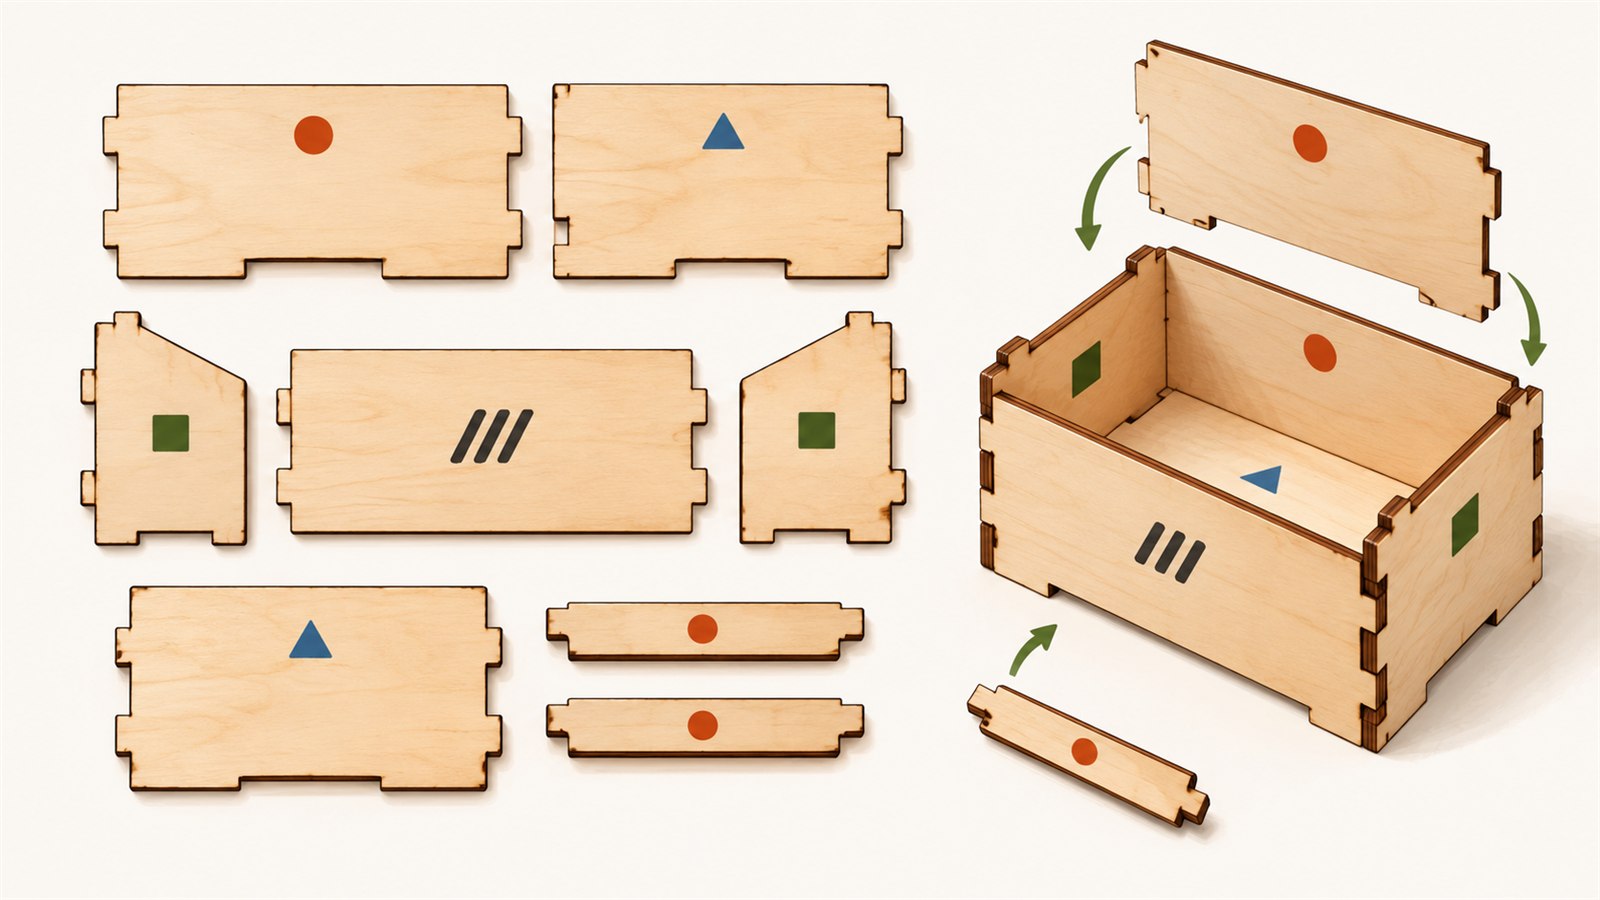
Simple numbers or meaningful identifiers make similar pieces easier to sort before assembly begins.
When part labels are useful
Labels are not necessary for every project. A single rectangle or two clearly different shapes may need no extra marking. They become useful when a file includes several similar parts, repeated layers, mirrored pairs or a kit that will be assembled later by someone else.
They are particularly helpful when a design has an assembly guide, a parts list or a repeatable production process. A short sequence such as P-1, P-2 and P-3 can be easier to follow than an internal filename. For a small number of very different pieces, meaningful names such as BASE, TOP, LEFT and RIGHT may be clearer.
Labels do not make an unclear design clear. If the joins, dimensions or assembly order are confusing, improve the design or instruction first. A number is navigation, not a replacement for an assembly guide.
Prepare the SVG before adding marks
Start with the finished SVG, where intended parts are already separate objects or groups. If the whole project is still one combined shape, decide how the pieces will be identified before adding labels. Logical groups in the source file also make later checking easier.
Check size and orientation before you label. If the file is scaled afterwards, a label can become too small, too large or too close to an edge. Also decide which side of the material will be visible in the finished project. Clear acrylic, decorative plywood, veneer and double-sided materials all make label placement more important.
Save the original separately. The labeled version is a preparation copy. Keeping the source intact makes it easier to revise the design, create a different size or remove the marks later without uncertainty.
Choose a labeling system people can understand
For most kits, a consecutive sequence such as P-1, P-2, P-3 is enough. It works well when an instruction sheet uses the same sequence. Existing SVG IDs can also be useful, but only if they are stable and understandable. An ID such as path-1083 rarely helps someone sort pieces after cutting.
For mirrored parts, make the difference explicit. Use L and R, or clear left/right names in the instruction. Do not rely on a similar outline being obvious after a piece has been rotated or placed face down.
Use one system consistently. Mixing sequential numbers, colour names and internal IDs in the same small project creates more work than it saves. The person assembling the item should not have to decode your file structure.
Place labels without damaging the design
Keep away from working edges
Do not place text near cut lines, tabs, slots, holes, thin bridges or join areas. Even if the label is not cut, it can become visible in an unwanted place or land on a sensitive area of the material. Look for a calm interior area of the part instead.
Some small or narrow pieces simply have no safe place for a label. That is a good reason not to force a tiny mark onto them. Use a separate sorting diagram, a temporary paper sticker or a layout reference instead.
Consider the visible face and the material
A light mark that is barely noticeable on plywood can be very obvious on pale acrylic or a finished decorative surface. If the material has a protective film, a temporary mark on the film may be possible in some workflows, but its usefulness depends on what happens when the film is removed. Test the actual material rather than assuming.
Grain direction, visible texture and front/back orientation also matter. Do not rotate or reposition labels mechanically when a part has a required direction. Check the finished orientation first.
Keep labels in a separate layer or group
A separate layer, or a clearly separate group, makes the marks easier to inspect, hide, assign to an operation or remove before export. Do not merge text into the part contour unless you intentionally want it to become part of the path.
Colour in an SVG is a visual cue, not a universal machine command. Before running a job, inspect how your own software has assigned every layer and object. The text must be either excluded or attached to a safe operation you have deliberately chosen.
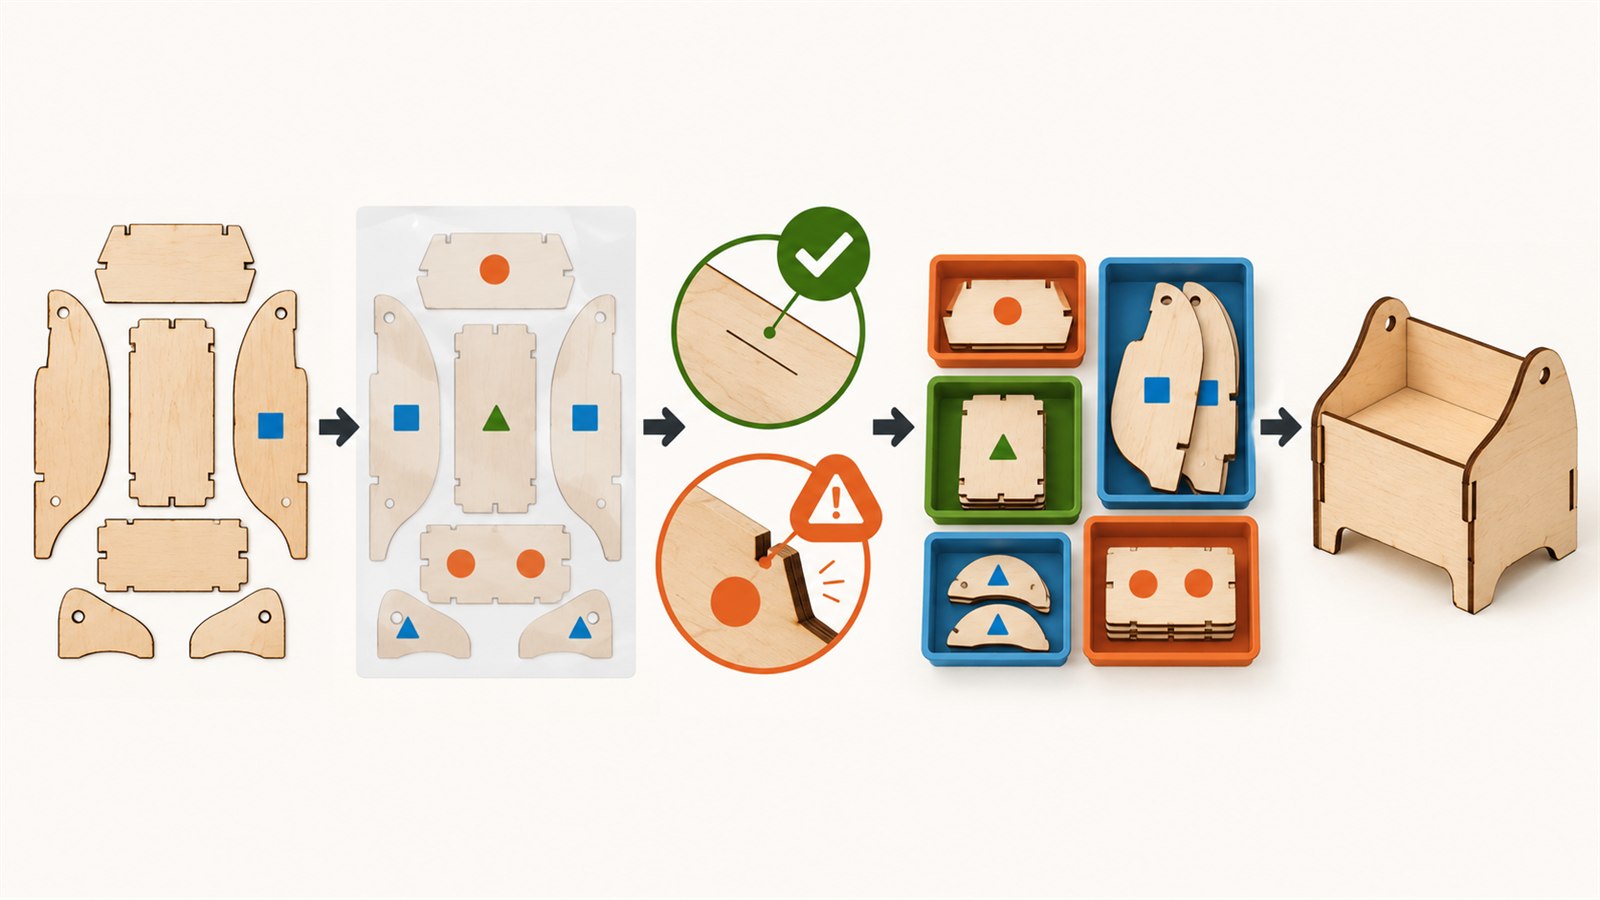
Labels are added to separate pieces, kept as a distinct preparation layer and used to sort the finished parts.
A practical workflow before a full job
- Open the finished SVG and confirm that the intended parts are separate.
- Pick one label system that matches the assembly guide.
- Place marks only in areas that will not affect joins, edges or visible surfaces.
- Keep the marks in a distinct layer or group.
- In the machine-control software, assign a safe engraving operation or exclude the labels entirely.
- Test the most crowded or smallest labeled piece on an offcut of the real material.
Do not begin with a full batch, especially when labels are close to a slot or on a thin component. A small test shows whether the mark is readable, how visible it is and whether it affects the finished appearance.
Common problems and practical checks
| Problem | Likely cause | Practical check |
|---|---|---|
| A number is cut through the part | Text was included in a cutting operation | Review the layer and operation assignment before running |
| A label spoils the finished face | Placement ignored the visible surface | Test on an offcut and move the mark to a hidden side |
| A number sits beside a slot | The label was placed in the first empty-looking area | Inspect edges, holes and joins at high zoom |
| Pieces are still confusing | Labels do not match the assembly guide | Use the same names or numbers in both places |
| Text is too faint or too strong | Size or contrast does not suit the material | Test on the same material and in the real final size |
Limits to remember
Labels are preparation marks, not automatic instructions for a machine. An SVG layer, text colour or object name does not automatically create a safe operation in every laser, CNC or cutting application. You need to check the actual operations in your own software before starting the job.
They also cannot replace an assembly guide for a complex product. A label helps you identify a part; it does not explain where the part goes, which direction it faces or how it connects. For a kit, pair clear marks with a simple diagram, photos or a parts list.
Frequently asked questions
Should every part be labeled?
Label the pieces that benefit from sorting or assembly help. Avoid marks that add no value or create unnecessary production work.
Can I use existing SVG IDs?
Yes, when the IDs are clear and stable for the intended assembly process. Replace technical or random IDs with simpler labels if a person needs to use them.
Do labels stay in the final product?
They can be lightly engraved in a safe location, or removed before cutting. The right choice depends on the material, finished appearance and workflow.
What if a small part has no room for a label?
Do not force a tiny unreadable mark onto it. Use a separate sorting reference, position on the material sheet or a temporary label instead.
Can colour automatically set the operation for my machine?
No. Colour can make the file easier to organise, but each application handles layers and colours differently. Confirm the real operation settings before a job.
Do labels replace assembly instructions?
No. They make it easier to match a part with an instruction, but they do not replace a clear assembly order or diagram.
Next practical step
Take a small design with several similar parts. Add a short sequence of labels in safe interior areas, test the most crowded component on real material and check how the marks appear in the actual operation list. Once that workflow is reliable, apply it to a larger kit.
Keep learning
Choose another practical guide or return to the tools for the next step.