Cutting and making
A photograph that works in a full rectangular frame does not always transfer well to a small photo frame, round pendant, keychain or engraving layout. After cropping, an important face may sit against the edge, a message may disappear or the subject may become too small to recognise. Good preparation is not about filling every millimetre. It is about preserving what matters and checking it inside the real shape of the final product.
This is useful for gift frames, photo keychains, memorial tokens, engraved keepsakes, small plaques and digital product previews. The same source image may need several versions: a round crop for a pendant, a horizontal crop for a frame and a higher-contrast version for engraving. Keep the original untouched and make clearly named copies for each purpose.
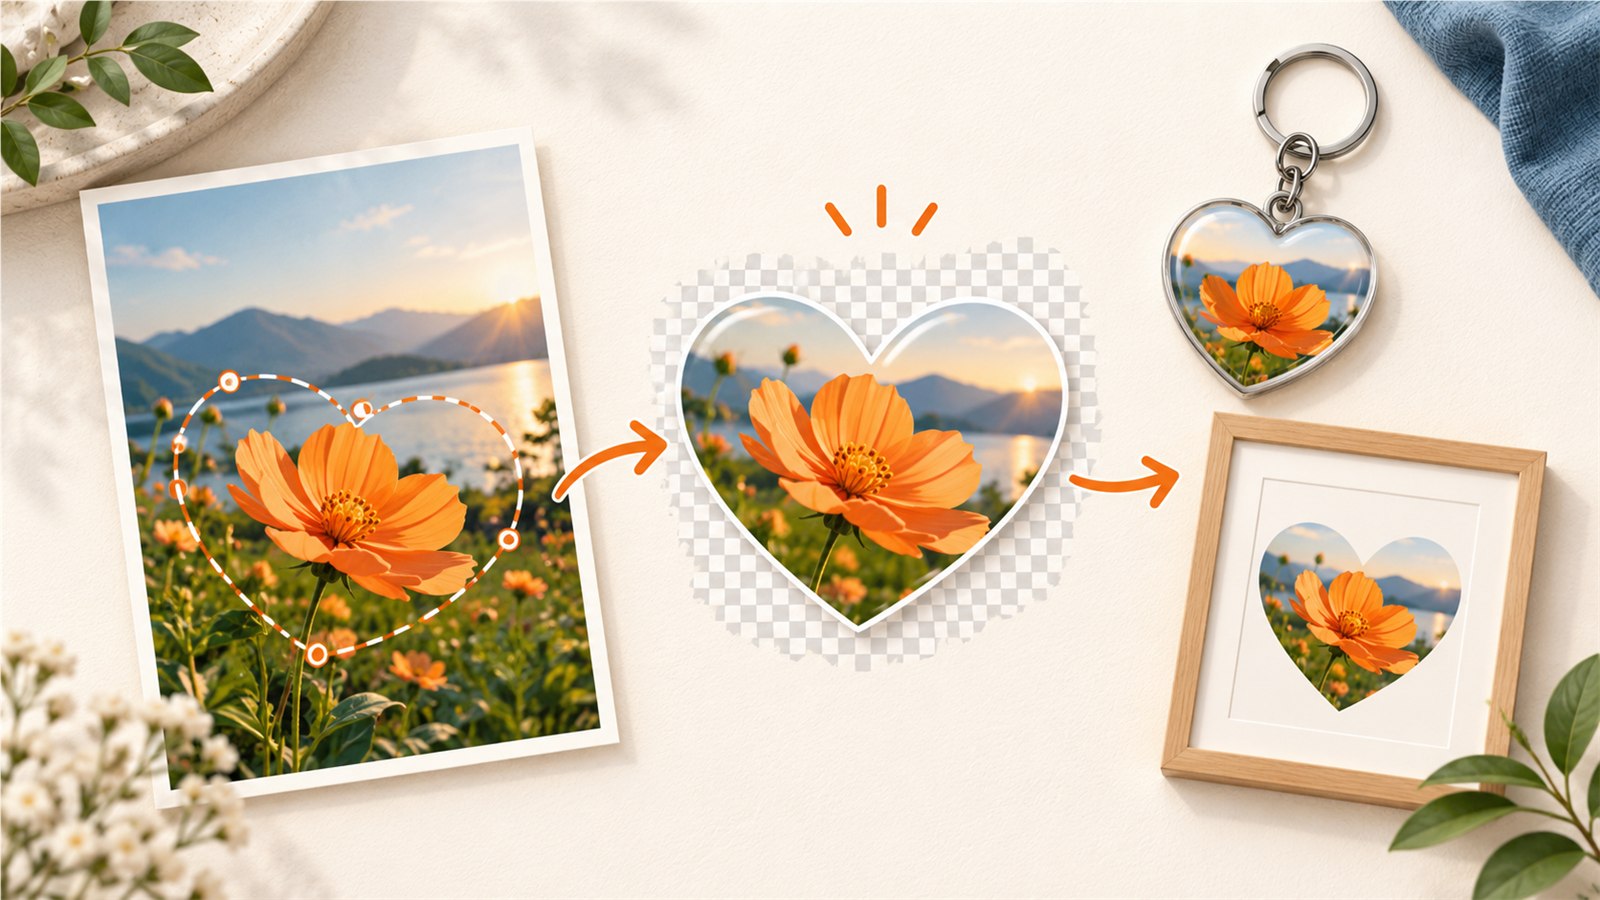
The main subject needs to remain recognisable inside the real product shape, not only in a rectangular editing window.
Start with the finished shape, not the crop tool
First decide where the image will appear: a rectangle, oval, circle, narrow keychain, plaque with a hole or an engraving area. Record the actual proportions and dimensions. A circle is not a small square, and a narrow vertical keychain is not an ordinary portrait photograph.
When physical production matters, consider more than the outer outline. A frame edge, product border, keyring hole, curved surface or cut allowance may take away part of the usable image. Overlay the intended shape on the photo before exporting so you can judge the composition early.
Identify what must not be lost
Look at the photo and name the main subject. It might be a face, two people, a pet, a message, an object held in a hand, a logo or a distinctive product detail. Then identify what is secondary: empty background, accidental edges, excess sky or a distracting table. The crop should protect the first category, not trim every side equally.
For a portrait, leave enough space around the head and avoid making the face look accidentally cut off by the product edge. For an object, check that recognisable edges and proportions remain. For an image with text, make sure the words are not close to the boundary and are still readable at the final size.
Sometimes the best choice is not a tighter crop but a calm background or border around the image. That can keep the subject whole when the source photo does not match the product shape.
A practical workflow
1. Save a separate copy
Work from a copy from the start. Name it for its purpose, such as family-photo-round-40mm or dog-tag-vertical-preview. A clear name prevents mix-ups and protects the original when you later need a different composition.
2. Match the proportions of the finished product
Crop the image to the product’s aspect ratio while preserving proportions. Do not stretch a photo horizontally or vertically just to fill the frame: faces, circles and objects will immediately look unnatural. If the shape is unusual, use its outline as a visual mask while keeping important content inside a safe area.
3. Leave an inner safety margin
The safe area is the distance between important content and the edge of the finished product. It matters because an outline can cover a small portion of the image, printing or engraving can shift slightly and edges are perceived differently at a small scale.
There is no universal safety-margin number. It depends on the shape, size, material and process. Rather than copying someone else’s measurement, make a test layout and check whether the important subject remains comfortable once the real boundary is applied.
4. Review a thumbnail
Reduce the image to approximately the finished size and view it without zooming. Is the face clear? Is the object recognisable? Can the message be read? If not, adding detail is not always the answer. You may need a different photo, a larger subject or a simpler composition.
5. Make a separate engraving version when needed
A colour-print photo and a photo intended for engraving may need different preparation. Engraving depends on contrast, major detail and the material. Do not assume a single export will give the same result everywhere. Create a separate version and test it on an offcut of suitable material.
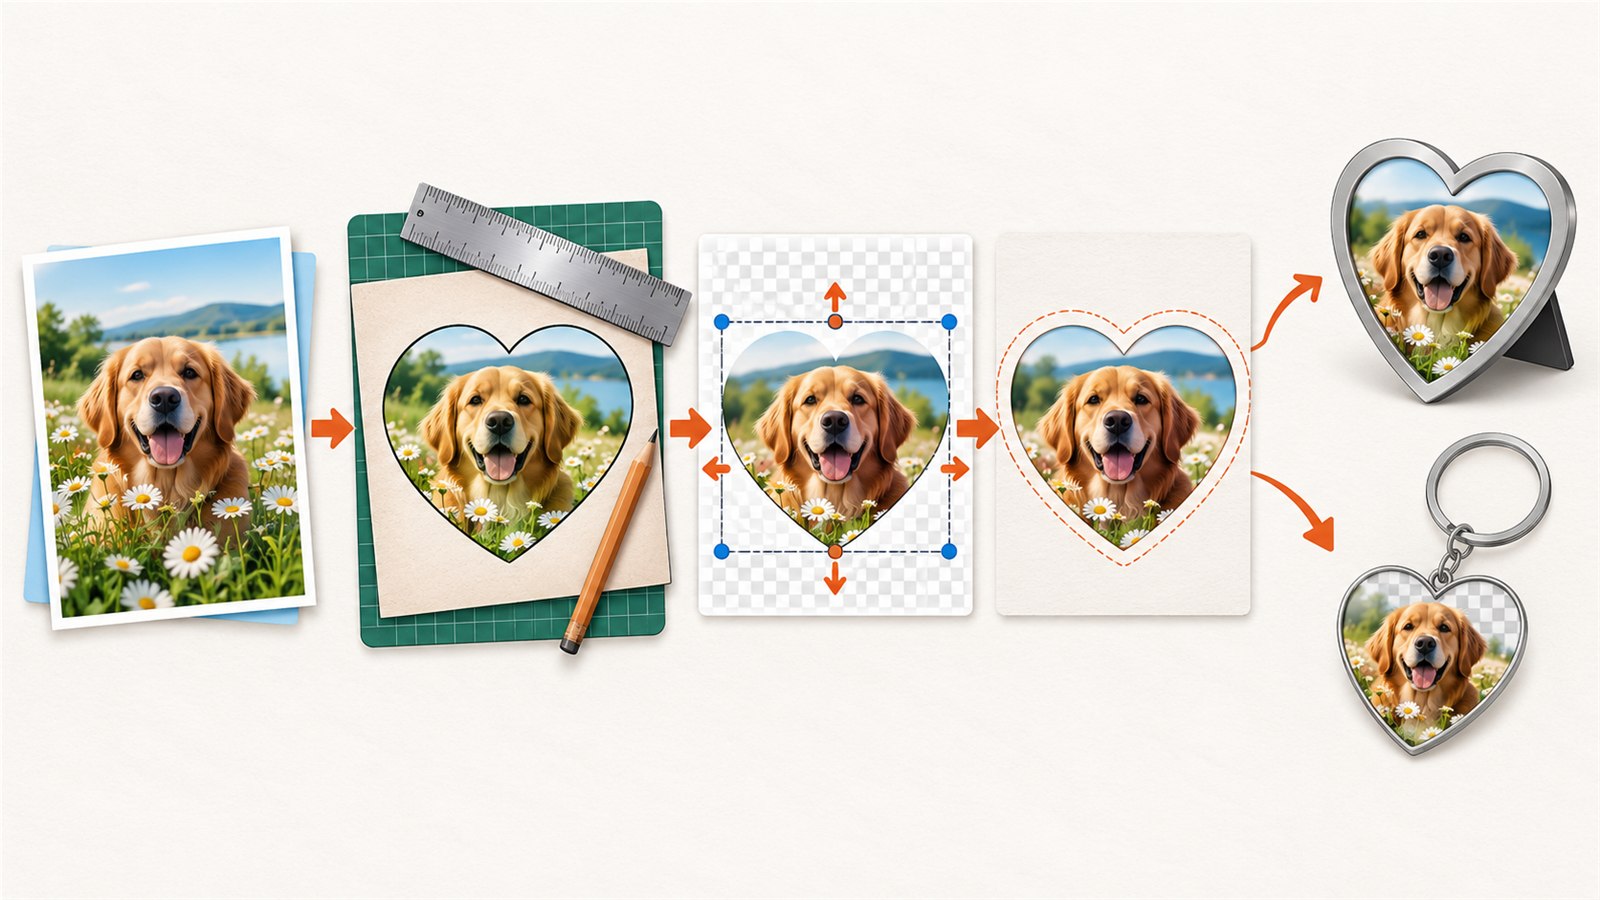
From original image to finished shape: protect the subject, match the proportions and check the composition inside the actual product boundary.
Check more than a rectangle
One of the most common mistakes is to judge a photo in a rectangular editor and then expect the same balance inside a circle or a complex outline. A circle removes corners, an oval changes the centre of balance and a keyring hole can land too close to a face or text.
Place the actual product outline over the image and view it at the intended size. For a physical item, print a test on plain paper, cut out the shape and place it over the photo. This simple step often shows a problem before a costly print or engraving run.
Common problems and checks
| Problem | Likely cause | Practical check |
|---|---|---|
| A face sits too close to the edge | The crop was made for a rectangle, not the real shape | Overlay the product boundary and add an inner margin |
| The image looks stretched | Width and height were changed independently | Compare the subject proportions with the original |
| Nothing is clear on a small product | Too much background or too much fine detail | View a thumbnail and enlarge the main subject |
| A hole or frame hides an important detail | The product’s working area was not considered | Add edges and holes to the layout before cropping |
| Engraving looks different from the preview | A colour photo was not prepared for that material | Test a separate version on a suitable offcut |
Frequently asked questions
Should a photo be cropped exactly to the product outline?
Not necessarily. Start with a rectangular copy in the right proportions, then use the outline as a check. Important content needs to remain safely inside the shape.
Can one photo be used for several products?
Yes, but make a separate copy for each shape and size. A round, narrow and horizontal version often need different compositions.
Why does a good portrait look poor on a keychain?
Small size, edges and a keyring hole reduce usable space. Choose a closer crop of the face or another image with a simpler background.
Should I increase contrast for engraving?
It can help in some cases, but it is not a universal rule. Results depend on the material, image and process, so test a separate version on a sample.
Is it okay to leave background around the subject?
Yes. Background can preserve the subject’s shape and provide a safe margin. Trying to fill every edge often makes the composition worse.
How do I avoid losing the original photo?
Work from copies, store the source separately and use meaningful filenames for different product versions. Do not overwrite one file for several shapes.
Next practical step
Choose one photograph and two real uses for it, such as a round keychain and a horizontal frame. Make two named copies, overlay the product outlines, check the thumbnails and print one paper test. The difference between the two layouts will show why one universal crop is rarely the best choice.
Keep learning
Choose another practical guide or return to the tools for the next step.