Cutting and making
For heat-transfer vinyl, a design needs more than a good appearance on screen. Fine lines must survive cutting and weeding, text must still read after transfer and the direction of the artwork may need to change before cutting. A problem that is invisible in an editor can turn a finished sheet of vinyl into fragile pieces that are difficult to weed, or leave lettering reversed on fabric.
Good preparation does not replace the requirements of a particular vinyl, fabric or machine. It helps you check the things you can control: size, mirroring, paths, layers, clear gaps and the most difficult feature in the design. Work on a copy and keep the original separate so you can prepare another size, colour or variant without losing the source file.
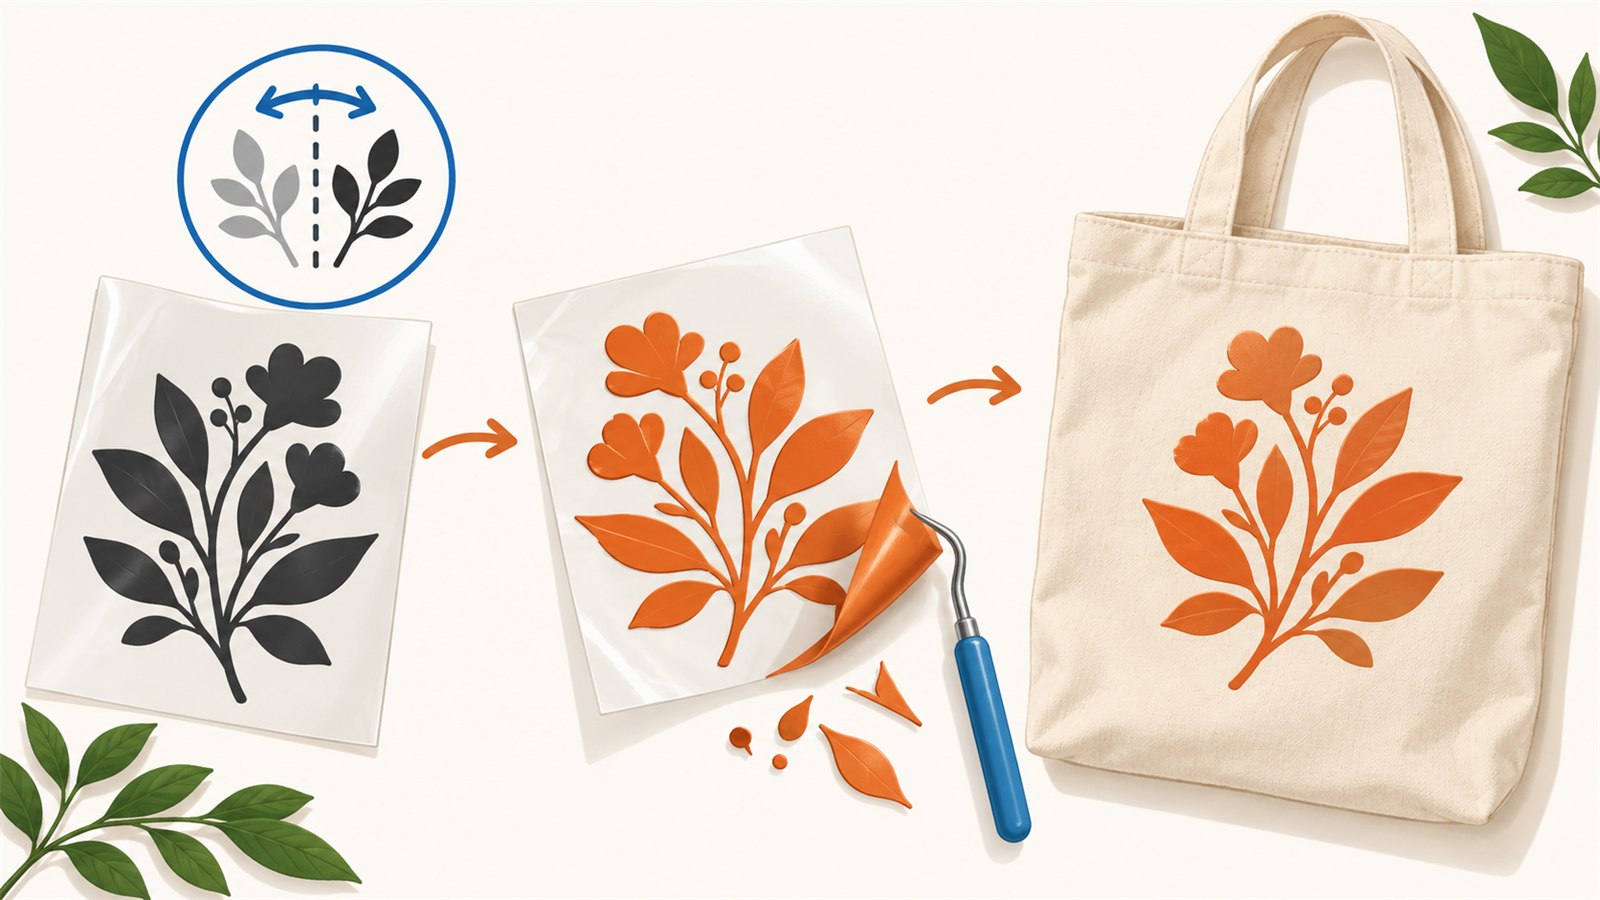
For HTV, the direction of the design, readable detail and practical weeding matter as much as the vector paths.
Confirm the direction before you cut
Many heat-transfer vinyl workflows require a mirrored design before cutting, but the requirement depends on the specific material and transfer method. Do not mirror a file automatically out of habit. Check the instructions for the vinyl and method you are using first.
Review text, numbers, arrows, logos, portraits and other asymmetric details especially carefully. An abstract pattern may look almost the same after reflection; a word or directional graphic will not. Before cutting, place the normal and mirrored versions side by side and ask: how will this read on the finished visible surface?
If you make several sizes of the same artwork, repeat the direction check for each export. Give working copies clear names: shirt-front-mirrored.svg is much more useful than final2.svg.
Check the design at its real size
Zoomed-in artwork can be misleading. A fine line that looks confident while filling half a monitor may be nearly invisible in a small name or logo. View the layout at its intended physical size and check:
- whether individual elements are substantial enough to cut and weed;
- whether close lines still have useful separation;
- whether small text can be read without zooming;
- whether counters inside letters and patterns are likely to remain clear;
- whether the design has a safe distance from the edge of the finished item.
There is no single safe size for every vinyl, machine or design. Consider the requirements of your material and your own process, then make a small test of the feature that worries you most.
Simplify what cannot be weeded reliably
Weeding—the removal of excess vinyl around and inside the design—often decides whether a layout is practical. Tiny dots, dense strokes, fragile curls and narrow gaps can make a beautiful illustration slow or unreliable to prepare.
This does not mean every complex design must become plain. Look at it as a physical film rather than a vector drawing. Sometimes a small text size increase, one fewer inner contour, a wider gap or a simplified version for a smaller garment size makes the result much more usable.
For text, inspect not only the outside of the letters but also internal spaces in characters such as O, P, A, B and similar forms. Those small areas can be the most vulnerable parts of the design during weeding and transfer.
Plan multi-colour work before cutting
For more than one colour, decide which elements belong to each layer, how they will align and where one colour will overlap another. Separate layers clearly by colour, name or file. Do not leave everything in one unclear group and expect to remember the order later.
Alignment marks can be useful in a personal workflow, but they should not accidentally become part of the finished design. Keep them clearly separate and check that they are removed or excluded where needed.
Review the full layered layout before preparing the colours. A small shift can spoil a fine outline or cover an important word. If the design depends on near-perfect alignment, consider whether a simpler arrangement would be more reliable for the project.
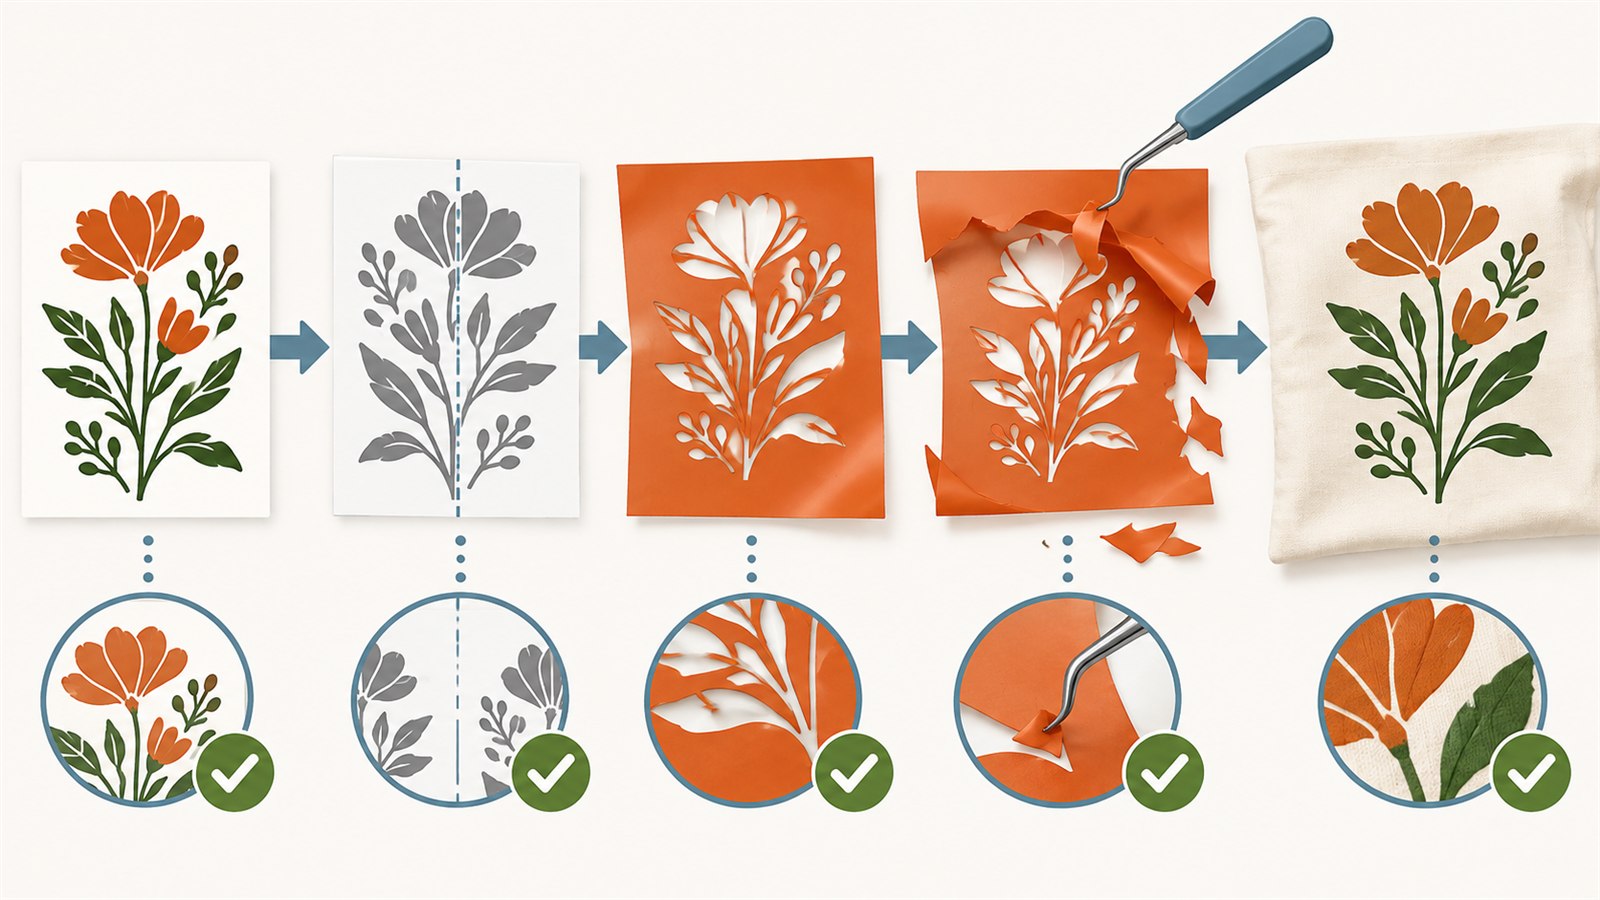
A practical sequence: check the direction, review actual size, organise clear layers and test the most difficult section before the full run.
Make a small test before the main job
You do not need to transfer the entire design to test a risk. Cut a small section containing the finest text, narrowest gap or most delicate internal path. Weed it as you plan to weed the main job. Then assess the result from normal viewing distance.
If you plan to transfer it, use material close to the final fabric and follow the requirements for that particular vinyl. Do not use this article as a source of universal temperature, timing or pressure settings: those depend on the material and its instructions.
Save a short note about the version you tested: design size, material, difficult feature and result. That is more useful than remembering only that “it worked last time.”
Common problems and practical checks
| Problem | Likely cause | Practical check |
|---|---|---|
| Text reads backward after transfer | Direction was not checked before cutting | Compare normal and mirrored versions with the finished visible orientation |
| Fine pieces are hard to weed | Lines and gaps are too small | Cut one difficult section at real size |
| Letter interiors disappear | The text is too delicate for the size | Inspect counters at final scale and simplify if needed |
| Colour layers do not align | There is no clear layer plan | Prepare distinct groups and check their position before cutting |
| The design is too small on fabric | Size was judged only on screen | Use a paper template or check scale on the real surface |
Frequently asked questions
Does every HTV design need to be mirrored?
No. The requirement depends on the specific material and transfer method. Check the vinyl instructions and verify direction with a small example.
Can very small text be used?
Sometimes, but only after a real-size test with your material. A thin typeface that looks attractive on screen may be difficult to weed or read after transfer.
How do I know when a design is too complex?
Look at the smallest feature as a physical piece: can it be cut and weeded without tearing or confusion? If you are unsure, test a small section or create a simpler version.
Do I need separate files for every colour?
That depends on your process. What matters is that the colour layers are clearly separated, their order is understood and alignment is checked before the final work.
Can one design work for several shirt sizes?
It can, but each physical size deserves a separate check. A smaller version may need simpler text or fewer details even if the larger design works well.
Where should the original and cutting copy be stored?
Keep the editable source apart from cutting exports. Clear names and a dedicated folder for ready-to-cut versions reduce the risk of selecting the wrong file.
Next practical step
Choose one existing design with text or fine lines. Make a copy at the intended size, check its direction against the vinyl instructions, cut only the most difficult feature and try weeding it. If the result takes too much effort, simplify that feature before cutting the full sheet.
Keep learning
Choose another practical guide or return to the tools for the next step.