SVG and file preparation
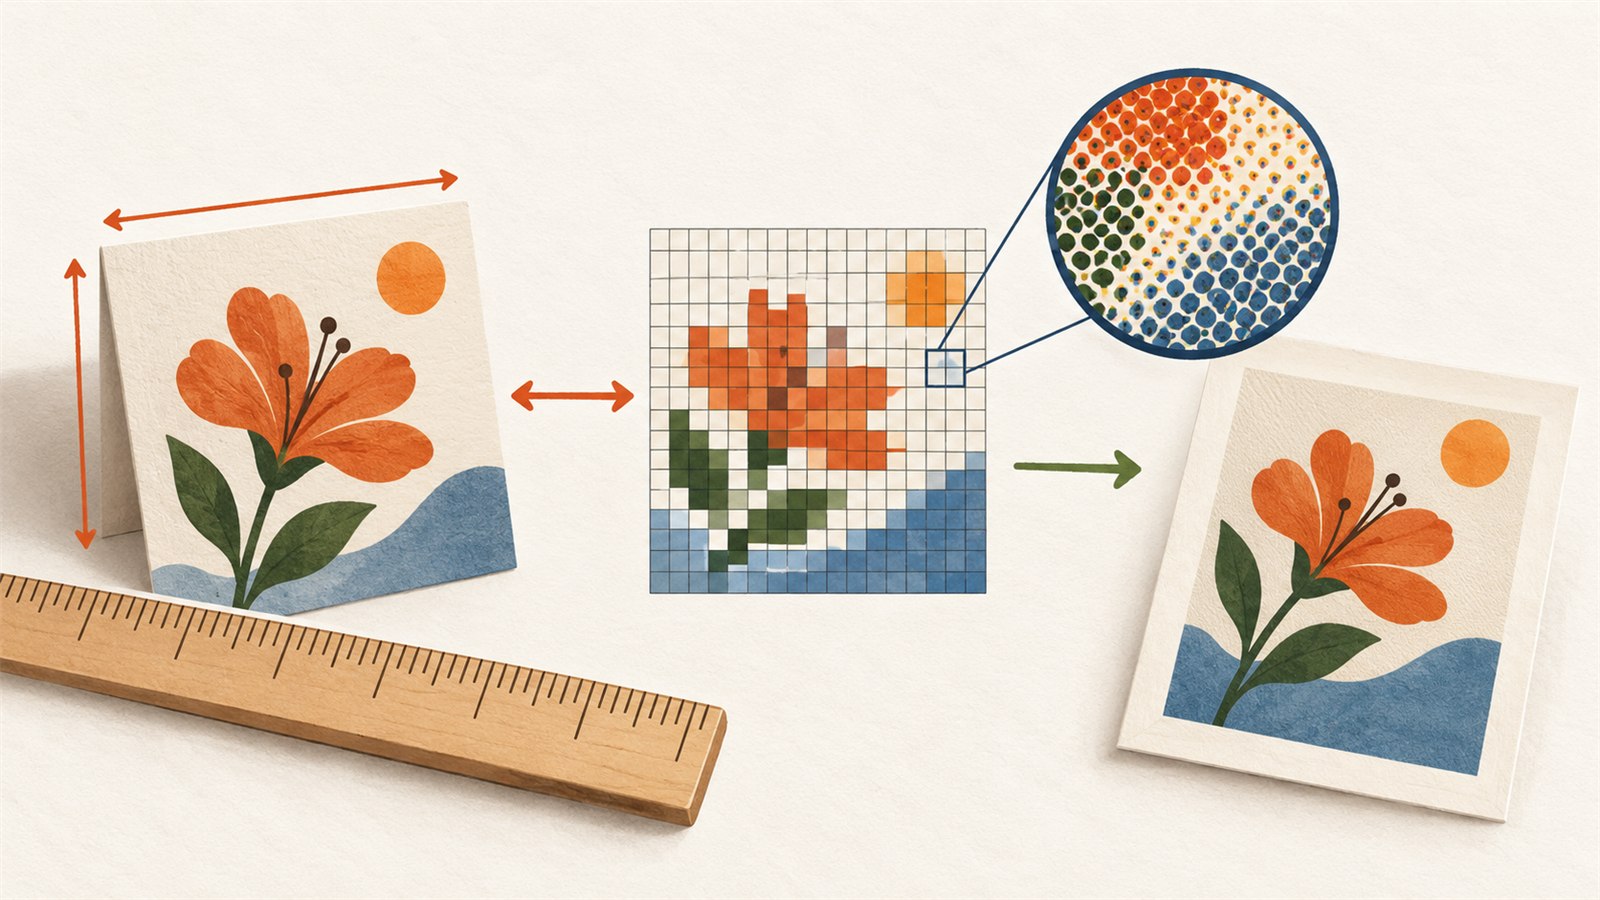
Millimetres and inches describe physical distance; pixels describe raster information, not size by themselves.
Design files often become confusing when physical measurements and image measurements appear in the same project. A product may be described in millimetres, a photo in pixels, a print setting in DPI and an SVG in a coordinate system that does not look familiar.
These terms are connected, but they do not mean the same thing. Understanding the difference helps you choose suitable settings for print, photos, laser cutting, plotting, web graphics and SVG design.
Physical measurements and image measurements
Millimetres and inches describe physical distance. They are useful when the final object has a real-world size: a sign, label, template, printed page, cut part or product component.
Pixels describe the number of small image elements in a raster file. They do not automatically describe a physical size. A photo that is 2,000 pixels wide can be printed at different physical widths depending on how those pixels are placed on paper.
For physical projects, decide the finished size first. For screen-based work, decide the intended display size or pixel dimensions. Do not assume one measurement system can replace the other.
Raster and vector files
A raster image is made from a grid of pixels. Photographs, screenshots and many exported image files are raster graphics. When a raster image is enlarged beyond the detail captured in its pixels, it may look soft, blocky or blurred.
A vector file describes shapes mathematically. Lines, curves and other forms are defined by paths and coordinates. SVG is a common vector format. Because the shapes are described rather than stored as a fixed pixel grid, vectors can often be scaled without the same type of pixelation.
This does not mean every vector output is automatically perfect. Stroke widths, small details, holes, offsets and machine limits still matter. A vector that scales cleanly on screen may require changes before it works well as a physical object.

Choose the end use and final size first, preserve the original, then test the exported file in the final workflow.
What DPI and PPI are useful for
DPI means dots per inch. PPI means pixels per inch. The terms are sometimes used interchangeably in everyday software, although they can describe different parts of an imaging or printing process.
For a raster image, a resolution value can describe how many image pixels are assigned to each physical inch during output. This helps relate pixel dimensions to print size. The same image can therefore be printed larger or smaller depending on the chosen relationship between pixels and physical distance.
DPI or PPI does not create new image detail. If an image has too few pixels, changing the resolution number only changes how those existing pixels are distributed. It does not turn a small image into a detailed large one.
DPI is also often misunderstood in SVG workflows. SVG shapes are vector geometry, not a fixed grid of pixels. A particular DPI value is not a universal answer for SVG sizing. DPI may matter for a raster image placed inside an SVG, but the SVG’s own physical dimensions and coordinate system still need to be checked.
A simple print calculation
The following is a hypothetical example, not a universal print rule.
Suppose you want a raster image to print at 10 inches wide and choose an example resolution of 300 pixels per inch:
10 inches × 300 pixels per inch = 3,000 pixels
The image would therefore need approximately 3,000 pixels across to match that example relationship at the chosen width.
This calculation does not guarantee a good print. The result also depends on the source image, viewing distance, content, printer, paper, output workflow and other requirements. If the source image is only 1,200 pixels wide, changing its resolution setting to 3,000 pixels does not add real detail.
For any specific print project, check the requirements of the printer, service or production workflow rather than treating one resolution value as universal.
Scaling vectors and raster images
Scaling a vector is often safe when the design is built from paths and the intended proportions remain unchanged. The artwork can become larger or smaller while retaining its mathematical shape.
There are still important exceptions. A stroke may scale with the object, stay visually constant or be converted into an outline depending on the software and workflow. A hole that is acceptable at one size may become too small to produce reliably at another. A narrow bridge may lose strength, and an offset may no longer provide enough clearance.
Increasing the size of a raster image does not create new pixels with genuine detail. It makes the existing information cover a larger area. Some software can estimate additional pixels, but that is not the same as recovering detail that was never captured.
When scaling either type of file, inspect the features that matter to the final result. Do not judge only by whether the overall design looks proportionally correct.
Choose units before starting
Define the final use
Decide whether the file is intended for a web graphic, physical print, photograph, laser-cut part, plotted design or another output. The final use determines which measurements matter most.
Choose the final size
For a physical object, define its intended width and height in millimetres or inches. For a raster image used on screen, define pixel dimensions or display size. For a printed raster image, consider both physical size and available pixel detail.
Preserve the original
Keep an untouched original file before resizing, converting or exporting. Work from a copy so you can return to the source if a later change produces an unexpected result.
Use the appropriate file type
Use vector geometry when the design needs clean scalable shapes or machine-readable paths. Use raster images when the content is photographic or depends on pixel detail. Some projects contain both, such as an SVG with an image placed inside it.
Test in the final program
Open or import the exported file in the software that will be used for production. A design program, print workflow, cutting program and web browser may display or interpret file dimensions differently.
Units, tasks and key checks
| Task | Primary unit | Key check |
|---|---|---|
| Physical cut part | Millimetres or inches | Confirm real dimensions, gaps, holes and machine limits |
| Printed document | Millimetres or inches | Check page size, margins and output scaling |
| Photograph or web image | Pixels | Check pixel dimensions and display context |
| Vector logo or illustration | Physical units or defined coordinate system | Confirm scale, strokes and export behaviour |
| Raster image inside SVG | Pixels plus intended physical size | Check image detail, scaling and the SVG container |
Common mistakes
Mixing inches and millimetres
A file can become much larger or smaller if a value intended in one unit is treated as another. Confirm the project unit before entering dimensions or comparing measurements.
Treating pixel count as physical size
A pixel count tells you how much raster information exists. It does not automatically tell you how large the image will be on paper or material.
Enlarging a small image
Increasing the dimensions of a small raster image does not add genuine captured detail. It may make the image appear softer or more pixelated.
Assuming SVG has a fixed DPI
SVG is based on vector geometry, so it does not have one universal DPI setting that controls every workflow. Physical output depends on the SVG’s dimensions, units, coordinate system and the interpreting software.
Ignoring stroke width
A vector design may contain strokes that behave differently when scaled or exported. A line that looks suitable on screen may be too thin, too thick or interpreted differently in the final process.
A practical example
Suppose you are preparing an engraved sign with a printed photo and vector text. The sign needs a physical width, so define its overall size in millimetres or inches. The text and border can remain vector elements, but check their stroke widths and spacing at the final size.
The photo is a raster image. Check its pixel dimensions and decide whether they provide enough detail for the intended printed or engraved area. If the image is too small, changing a DPI number will not restore missing detail.
Finally, export or place the elements in the workflow that will produce the sign. Verify the sign’s physical size, text scale and photo appearance before using the final material.
Frequently asked questions
Should I use millimetres or inches?
Use the unit that matches the final physical workflow and the requirements of the people or software receiving the file. Choose deliberately and keep it consistent.
Are pixels a unit of physical size?
No. Pixels measure raster image information. Their physical size depends on how the image is displayed or printed.
Does changing DPI improve a small image?
No. It changes how existing pixels are assigned to physical output but does not create missing detail.
Is vector artwork always safe to enlarge?
Vector shapes can often be enlarged without pixelation, but strokes, holes, narrow bridges, offsets and machine limits still need to be checked.
What happens when I enlarge a raster image?
Existing pixels cover a larger area. Depending on the source and interpolation method, the result may become soft or visibly pixelated.
Does every SVG use the same DPI?
No. SVG uses vector geometry and can contain different units and coordinate settings. Different programs may interpret its physical dimensions differently.
Why should I test an export in the final program?
The design application, production software and output device may handle units, scale, strokes or raster content differently. A final test reveals problems before production.
Conclusion
Millimetres and inches describe physical size, while pixels describe raster image information. Vectors describe shapes, and DPI or PPI helps relate raster pixels to physical output without creating new detail.
Choose the final use and size first, preserve the original, keep units consistent and test the exported file in the program that will produce the result.
Keep learning
Choose another practical guide or return to the tools for the next step.