Digital products and selling
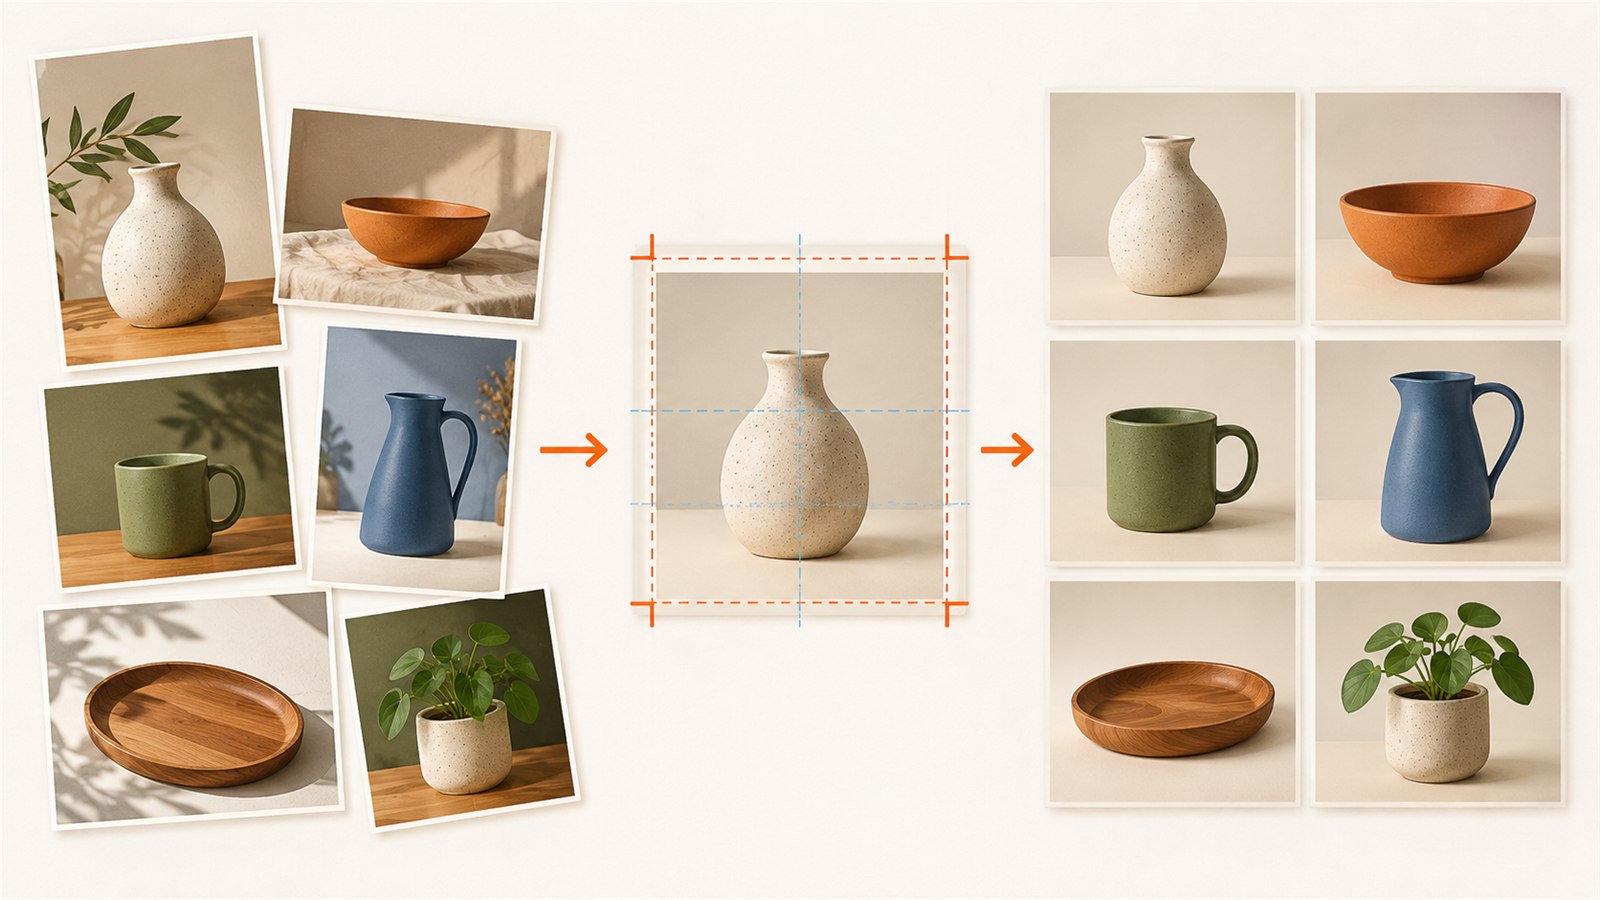
Consistent crops, margins and presentation make a product-image batch easier to review.
A shop can have excellent products and still look less trustworthy when its images feel inconsistent. One listing may use a bright background, another a tight crop, and a third may show the product at a completely different scale. Visitors then have to work harder to compare products and understand what they are buying.
Inconsistent images also create extra work. If every photo is prepared differently, updating listings or adding a new product takes longer. A batch workflow helps you create a consistent presentation while leaving enough flexibility for each product to look natural.
The aim is not to make every image identical. It is to give the shop a clear visual system that supports the products.
Prepare the batch before editing
Start by collecting the original images and deciding what the batch needs to communicate.
Keep clean originals
Work from copies rather than from the only version of a photograph. Store original camera files separately from edited images. An original may later be needed for a different crop, a detail image, a larger export or another platform.
A simple backup system is enough: keep originals in a clearly named folder and make a second safe copy when the images are important to your business.
Define the purpose of each image
Decide what each image should show. A main product image may present the complete item clearly. A detail image might show texture, personalisation or a functional feature. A lifestyle image may demonstrate how the product looks in use.
The purpose affects the crop, margins, background and position in the listing. Without this decision, a batch can become a collection of attractive images that does not answer practical customer questions.
Identify the protected crop area
Before applying a standard canvas or crop, identify what must remain visible. This could be the whole product, a logo, a personalised name, a clasp, a pattern or another important feature.
A fixed crop is useful only when it protects the subject. Do not cut off part of a product simply because the original photo was framed differently.
Choose one visual style
Decide which elements should be consistent: background treatment, approximate product scale, margin around the subject, colour or lighting treatment, orientation, image order and any watermark.
The style can be simple. Consistency usually matters more than elaborate effects.
Decide the image order
Choose a repeatable sequence for listings with several images. The first image might show the complete product, followed by a detail, a scale reference, another view and an image showing the product in use.
The exact sequence depends on the product. A repeatable order helps visitors understand each listing without learning a different structure every time.
A practical batch workflow
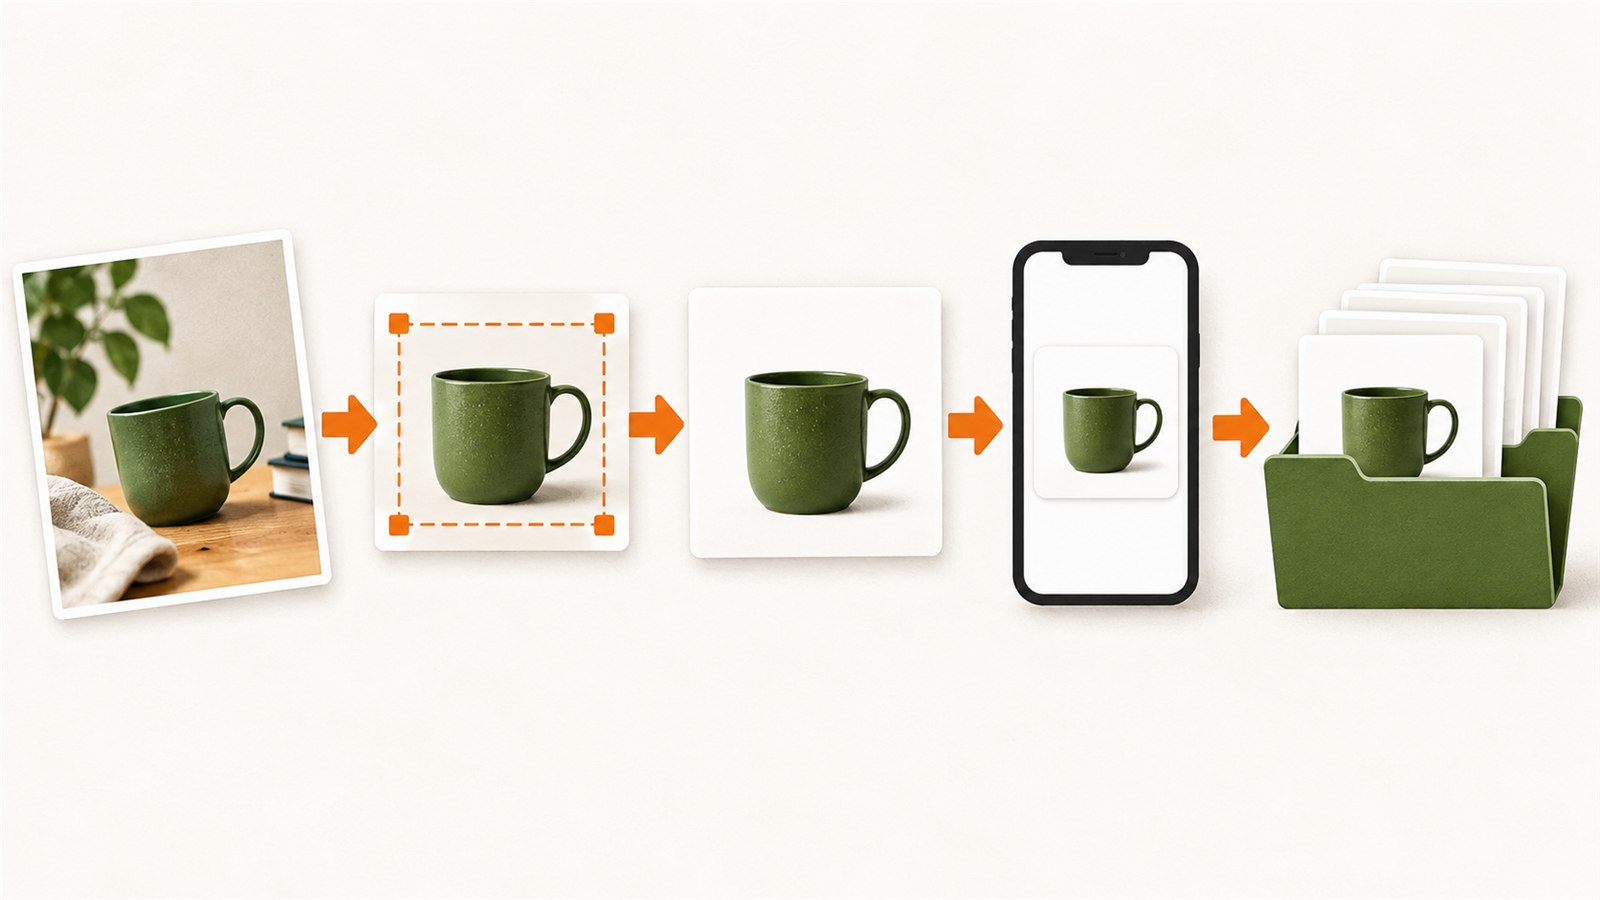
A repeatable workflow helps prepare product images consistently from original photo to final export.
1. Choose a consistent canvas and ratio
Select a canvas shape that suits the platforms and listing layouts you use. Image requirements and recommended proportions can change, so check the current rules of each platform before publishing.
A consistent ratio makes a shop easier to browse and reduces the need to create completely different versions of every image. If you sell through several channels, decide whether one flexible master version is practical or whether separate exports are needed.
2. Protect the important object
Place each product inside the canvas without cutting off useful details. Leave enough space around it for previews, platform cropping and different screen sizes.
A product may need extra room near one edge if it has a handle, ribbon, shadow, text or another feature extending beyond its main shape. Keep the composition balanced, but do not sacrifice useful information for perfect symmetry.
When products have different shapes, compare their visible scale rather than forcing every object to occupy exactly the same percentage of the canvas. A tall item and a wide item may need different treatment to remain clear.
3. Use consistent margins
Similar margins help images feel like part of one collection. The product does not need to occupy exactly the same area in every image, but large differences can make one item appear much bigger or smaller than another.
Use a sample image or guide area as a visual reference. Then make reasonable adjustments for unusually tall, wide or irregular products. Consistency should support clarity, not hide a product’s real proportions.
4. Review the batch as thumbnails
Zoomed-in editing can hide problems that become obvious when images are viewed small. Review the full set as thumbnails and compare crops, margins, backgrounds, brightness and product scale.
Thumbnail review also helps you check image order. Ask whether the first image communicates the product quickly and whether later images add useful information.
5. Name files clearly
Use filenames that identify the product, variant and image position. A consistent pattern makes it easier to upload several listings, replace one image or locate the correct version later.
Avoid relying only on camera-generated numbers, especially when products have similar designs or multiple variations.
6. Export copies
Keep listing-ready exports separate from originals and working files. Use settings appropriate to the platform and intended display quality, but do not assume that one export setting works everywhere.
If you need several versions, label them clearly, such as master, listing or preview. Keep a higher-quality working version and create fresh exports when possible instead of repeatedly resaving a compressed upload copy.
7. Inspect the results on a phone
Many customers view listings on a small screen. Open the exported images on a phone or another narrow display and check whether the product remains easy to understand.
Look for details that disappear, text that becomes unreadable, shadows that make the product look dirty and crops that feel too tight. A composition that looks spacious on a large monitor may feel crowded on a phone.
Check the first image especially carefully. It should identify the product without requiring the viewer to zoom in.
Resizing, cropping, compression and watermarking
These actions solve different problems.
Resizing changes image dimensions. It can prepare a file for a display area or reduce its size, but it does not improve a poor photograph.
Cropping removes part of an image and changes what the viewer sees. It can improve composition, but it can also remove important product information.
Compression reduces file size by storing image data more efficiently. Depending on the method and settings, it may reduce visible quality. Excessive compression can create blocky edges, blurred text or other artefacts.
Watermarking places a logo, mark or text over the image. It may help identify the source, but a watermark that is too large, dark or frequent can distract from the product. Use it only when it serves a clear purpose and check how it appears at thumbnail size.
These operations are not interchangeable. Resizing will not fix a poor crop, compression will not correct bad lighting, and watermarking will not prevent every form of image reuse.
Phone photos and HEIC/HEIF compatibility
Phone cameras often produce high-quality images, but the file format may not be accepted equally by every browser, editor, marketplace or customer device. HEIC and HEIF are common examples of formats that can create compatibility questions.
Do not assume that every website accepts HEIC or HEIF directly, or that every application displays those files in the same way. Check the current requirements of the platform and software used in your workflow.
If conversion is needed, keep the original phone file and create a separate working copy. Review the converted image for colour, orientation, transparency, metadata and visible quality. A conversion can affect more than the filename extension.
Platform requirements can change
Sales platforms may update accepted formats, recommended dimensions, display behaviour or file-size limits. A setting that worked for an earlier listing may not remain the preferred choice.
Before publishing, check the current requirements of each platform where the images will appear. If you sell through several channels, compare their instructions instead of assuming that one platform’s guidance applies everywhere.
Common problems and practical checks
| Problem | Likely cause | Practical check |
|---|---|---|
| Products appear at different scales | Inconsistent margins or crop decisions | Review the batch as thumbnails and compare subject size |
| Important details are cut off | A fixed crop ignored the product’s shape | Identify the protected crop area before applying the canvas |
| Images look blurry after export | Excessive compression or repeated resaving | Compare the export with a higher-quality working copy |
| Photos fail to upload or preview | The format or size is not accepted | Check the platform’s current requirements |
| The shop feels visually disorganised | Too many unrelated backgrounds or styles | Choose a simple visual system for the batch |
| Watermarks dominate the image | The mark is too large, dark or frequent | View it on a phone and reduce its visual weight |
| Listing updates become confusing | Filenames do not identify product or sequence | Use a consistent product and image-number pattern |
Common mistakes
Do not stretch an image to fill a canvas. Preserve its proportions and use cropping or empty space instead. Avoid relying on one huge file for every purpose; keep a suitable master version and create exports for the actual workflow. Do not skip the mobile preview, overwrite originals or mix unrelated visual styles unless the difference is deliberate.
Frequently asked questions
Should every product image use exactly the same crop?
Not necessarily. A consistent canvas and visual style are useful, but different products may need different crops to remain clear. Protect the important object first.
What is the best image format for every marketplace?
There is no single format that works best everywhere. Check the current requirements of the platform where you plan to publish and keep an adaptable master copy.
Can I edit phone photos directly in HEIC or HEIF?
It depends on the browser, editor and platform. Compatibility varies, so keep the original and create a separate copy if conversion is required.
Should I watermark every product image?
Only if a watermark serves a clear purpose for your business. A large or highly visible mark may distract from the product, especially on small screens.
How can I make different-shaped products look consistent?
Use the same canvas ratio, similar visual margins and a repeatable background or colour approach. Allow adjustments so unusually tall or wide products remain understandable.
Why do images look fine on a computer but poor on a phone?
Small screens reveal problems with cropping, contrast, text size and product scale. Review exported images on a phone before publishing.
Should I keep the original camera files?
Yes. Originals give you more flexibility for future crops, platform changes, larger exports or different product presentations.
Conclusion
A consistent image batch makes listings easier to browse and reduces repetitive editing work. Start with clean originals and a clear purpose, then use a consistent canvas, protect important details, review thumbnails and inspect final exports on a phone.
Before publishing, check the current requirements of each platform and keep originals separate from listing copies. This gives you a more flexible image library for future updates.
Keep learning
Choose another practical guide or return to the tools for the next step.